Saturday, 29 December 2012

Selecting Your Warm Layer

There are many types of warm layer from a down jacket to a simple fleece. All have their uses alongside different advantages and disadvantages of the different material used.

Materials

  • Down - This is extremely warm and very expensive. But when it becomes wet or damp it loses most of its insulation properties. In Scotland down wouldn't be particularly useful as it will get wet quite quickly and therefore not be insulating in a short time. Down has its main use in the Alps or the Poles where it is dry rather than damp so the insulation isn't affected.
  • Synthetic - These are not quite as warm as down but in the UK this doesn't make a great deal of difference with the temperatures we get. When a synthetic material gets wet it can retain up to about 75% of its warmth. These are still expensive jackets but are worth investing in (normally called Belay Jackets). Synthetic jackets are useful as an extra layer to throw over all existing layers when you stop to add extra insulation to prevent you cooling down (this is useful especially in winter).
  • Fleece - This is the cheapest of the materials and the most useful, they are lightweight and can be packed away quickly. They can be layered on top of each other to increase the warmth. They retain most of their warmth if they get wet. While it is a synthetic fabric, it is separate in this list as it is not filled. Fleece Jackets are mainly useful as the Mid Layer of the layering system because of their insulating properties and the lightweight properties in comparison to other materials.
  • Wool - This becomes really heavy when wet and is not recommended at all for mountaineering with.
  • Softshell - Effectively this is a fleece jacket that is coated so that it doesn't let any air through and is water resistant (not waterproof!). This is versitile and very useful, it adds extra insulation properties to a Fleece and is still very lightweight.
Recommended Kit

  • Fleece Jacket
    • Low Budget (Bear Grylls Bear Originals Microfleece - £30)


    • Medium Budget (Mountain Hardwear Microchill Zip Top - £50)
Click to close

    • High Budget (The North Face Mortimor 1/2 Zip Pullover - £75)
  • Softshell Jacket
    • Low Budget (Craghoppers Track Jacket - £50)
Click to close
    • Medium Budget (Mountain Equipment Arrow Jacket - £90)
Click to close
    • High Budget (The North Face Mens Apex St Elias Soft Shell Jacket - £130)
Click to close
  • Belay Jacket
    • Low Budget (Keela Belay Advance Jacket - £75)
belay_2_1.jpg (1200×1200)
    • Medium Budget (Rab Photon Jacket - £120)
Click to close
    • High Budget (Vaude Khumbu Jacket - £175
All Prices are based on RRP: you can get them allot cheaper elsewhere online eg ebay or other online retailer.

Avalanche Risks

The MCofS website has lots of useful information on it including Avalanche Risks, which it covers especially well.


Selecting Your Base Layer

There are a few types of base layers but their functions are very similar, they all trap a thin layer of air against the body. This helps keep the body warm, another function a base layer should perform is to wick sweat away from the body, this also maintains warmth. Base layers can be used in summer or winter, it is a personal preference as to when you wear them.

Materials
There are 2 main materials which are used in base layers:

  • Merino Wool - This wool comes from the Merino Sheep and is thin, lightweight and odor resistant. It is ideal for freezing conditions and as it is lightweight it is ideal for a base layer. This is unfortunately more expensive in comparison to synthetic.
  • Synthetic - These are a man made fiber that is lightweight and has wicking properties. These have less odor resistance than Merino Wool but dry faster. Synthetics are quite a bit cheaper than Merino Wool.
Note
Base layers do not prevent sweat, they wick the sweat away quickly to help prevent heat loss. 

No Cotton
Cotton stores water which can lead to less comfort and of course hypothermia.
Remember: 
COTTON = DEATH

Recommended Base Layers
These are for sets of base layers, so a top and bottom to keep you nice and toasty.
  • Low Budget (Regatta Adventure Tech Fleece Baselayer Set - £25):

  • Medium Budget (Helly Hansen Mens Lifa Twin Pack - £60):
Click to close
  • High Budget (Helly Hansen Mens Merino Twinpack - £110):
All Prices are based on RRP: you can get them allot cheaper elsewhere online eg ebay or other online retailer.

Friday, 28 December 2012

The Layer System

The layering system is a simple concept where different layers of clothing are combined to keep warmth in and water/wind out. Each layer of the system has a specific purpose that it has been designed to do, this means that you can easily change what you are wearing without carrying extra bulk. This results in a more efficient use of clothing.
The following video explains this:


Referring to http://www.abc-of-mountaineering.com/articles/mountaineeringlayeringsystem.asp for a great explanation:


The Layering System

In general, there are four types of layers:
  1. Base Layer: The task of the base layer is to maintain a dry and comfortable microclimate next to your skin. The base layer will therefore absorb all the moisture from your skin and then spread it out over the surface of the base layer where it will be evaporated via the other clothing layers. Typical base layer fabrics are: CoolMax® , Polartec® PowerDry®, Patagonia® Capilene®,and Helly Hansen Lifa. This knowledge will also help you to make the right choice when buying clothing.

  2. Insulation Layer(s): This layer provides more warmth if the base layer and the shell layer do not provide enough insulation on their own. It traps small pockets of air in the fabric the insulation layer is made of which slows down the loss of heat. Typical insulation fabrics are: Polartec® Classics® ,Berber pile, and Windstopper®.

  3. Shell Layer:The shell layer provides protection from wind, rain, sleet, and snow, without allowing the build-up of condensation inside the clothing system. It protects while allowing moisture vapor to pass through. Shell fabrics are Gore-Tex, Hyvent, Aqua-Dry, and Dri-Lite.

  4. 'Super' Insulation Layer. It is enough for most people to have the first three layers. However, in extremely cold conditions, you will need to add a large amount of insulation as a fourth layer. Down and Polarguard can both be ussed for this layer.
We will go through this layering system in detail as it is essential for surviving in the mountains. Also notice the links at the bottom of each type of gear - these will link you to our shop where you can immediately buy your gear! 
In our special section, you can read more on High Performance Fabrics

Base Layer

Thermal Underwear
  1. Thermal Body Shirt
    Depending on the temparature (make sure to check this), you will want to use thermal underwear as a first level of clothing. It will keep you warm and dry by transferring moisture to the next layer.
  2. Thermal Pants
    Depending on the temparature (make sure to check this), you will want to use thermal underwear as a first level of clothing. It will keep you warm and dry by transferring moisture to the next layer.
  3. Socks
    To keep your feet warm, dry, and padded against hard impacts, you will want to use thick socks, preferably special Mountaineering socks that will give you more specialized features.

Insulation Layer

Insulation Layering
  1. Fleece Jackets or Sweater
    As a second layer, you will want a Fleece or a Wool sweater.

  2. Shell Pants
    On top of your base layer, put on your Shell Pants. Good Pants should protect from the wind, cold, and the rain.
  3. Mountaineering Boots
    Good Boots are necessary not only to protect your feet, but also to give you good support on the long hikes.

Shell Layer

Shell Layer
  1. Mountaineering Jacket
    Finish off your upper body layering with a waterproof and windstopping jacket or top shell.
  2. Gloves
    Protect your hands from snow, ice, and impacts with padded gloves.


Selecting Waterproof Trousers

Waterproof trousers are another key piece of kit and the same consideration that goes into selecting waterproof jackets needs to go into selecting waterproof trousers.

Seasons
There are a few features which are useful to have in waterproof trousers (as with waterproof jackets it depends on the season that they are going to be used in as to what features are useful) such as:
  • All
    • Side Zips (Full length is more useful)- These help temperature management and allow them to be put on without removing boots.
    • Exterior Pockets - Essential for map storage, keeping things handy or putting hands in.
    • Adjustable Ankle Straps - Help keep the wind and water out.
  • Summer (Ideally Sunny and Showers)
    • Packable - For storage in rucksacks while not in use.
    • Lightweight - You don't want to carry a huge coat for summer it can be a waste.
    • Breathable - As it is warmer you will sweat more and a breathable trousers ill help. These trousers are normally more expensive and it depends on the pressure outside of the trousers in comparison to the inside of the trousers as to whether they are breathable or not. 
  • Winter (Snow and Ice)
    • Tough - You don't want to rip something easily when it is freezing and blowing a gale.
    • Heavyweight - This will normally be more durable and less likely to rip than a lightweight trousers.
The same manufacturers and materials are generally good for trousers as they are for jackets...

Materials
As mentioned previously there are many materials, such as Gore-Tex and Event fabrics which have a good reputation for being waterproof and a little breathable. There are many others where manufacturers make their own material to achieve the same effect. Generally a lighter weight jacket for summer has 2 layers of fabric to allow for extra breath-ability. A heavier weight winter jacket generally has 3 or 4 layers of fabric to  be tough and not rip easily and conserve heat.

Manufacturers
There are many manufacturers of waterproof jackets, some good companies to purchase from are:
  • Keela - They are a Scottish company who sell good kit at a reasonable price.
  • Mountain Equipment - They are an English company who sell great kit but at an expensive price.
  • Mountain Hardware - They are an American company who sell great kit at a reasonable price.
  • The North Face - They are an American company who sell great kit at a high price.
  • Marmot - They are an American company who sell great kit at a high price.
  • Berghaus - They are an English company who sell good kit at a reasonable price.
  • Rab - They are an English company who sell great kit at a slightly expensive price.
The list goes on...

Recommended Kit
We in the club have Keela jackets in the store which have stood the test of time. We have created the following short list for summer or winter, taking budget into account:

  • Summer:
    • Low Budget (Keela Multi Activity Trousers - £42)


    • Medium Budget (Berghaus Mens Deluge Overtrousers - £50)
Click to close

    • High Budget (Marmot Precip Pants - £65)


  • Winter
    • Low Budget (Keela Munro Salopettes - £125)

    • Medium Budget (Páramo Aspira Salopettes - £200)


    • High Budget (Rab Latok Salopettes - £250)
Latok Salopettes
All Prices are based on RRP: you can get them allot cheaper elsewhere online eg ebay or other online retailer.

Thursday, 27 December 2012

Selecting A Waterproof Jacket

A Waterproof Jacket is something that you should take with you on any walk, no matter where you are. However there are many types of waterproofs out there and it can be quite confusing to know what to look for, with different materials from different manufacturers. Remember if you go for a manufacturer with a good reputation for making quality goods you will likely get a good product from them and you won't be looking for a new jacket for a while.

Of course in the mountains in winter you will most likely need a different jacket from a summer jacket used around town. 

Seasons
Firstly lets go through what you may need in different seasons of which there are 2 main seasons in the UK.
Here are the recommended features for each:
  • All
    • Adjustable Hood - This is essential no matter where you are, whether fold-able or not you shouldn't venture into the mountains with a waterproof without a hood.
    • Pit Zips - These help temperature management.
    • Interior Pocket - Lets face it somethings we want to have handy and dry (or warm in winter).
    • Exterior Pockets - Essential for map storage, keeping things handy or putting hands in.
    • Waterproof Zip/Storm Flap - Whether it is a full length, 1/4 length etc it is very useful for temperature management.
    • Adjustable Wrist Straps - Help keep the wind out.
  • Summer (Ideally Sunny and Showers)
    • Packable - For storage in rucksacks while not in use.
    • Lightweight - You don't want to carry a huge coat for summer it can be a waste.
    • Breathable - As it is warmer you will sweat more and a breathable jacket will help. These jackets are normally more expensive and it depends on the pressure outside of the jacket in comparison to the inside of the jacket as to whether they are breathable or not. 
  • Winter (Snow and Ice)
    • Tough - You don't want to rip something easily when it is freezing and blowing a gale.
    • Heavyweight - This will normally be more durable and less likely to rip than a lightweight jacket.
Materials
As mentioned previously there are many materials, such as Gore-Tex and Event fabrics which have a good reputation for being waterproof and a little breathable. There are many others where manufacturers make their own material to achieve the same effect. Generally a lighter weight jacket for summer has 2 layers of fabric to allow for extra breath-ability. A heavier weight winter jacket generally has 3 or 4 layers of fabric to  be tough and not rip easily and conserve heat.

Manufacturers
There are many manufacturers of waterproof jackets, some good companies to purchase from are:
  • Keela - They are a Scottish company who sell good kit at a reasonable price.
  • Mountain Equipment - They are an English company who sell great kit but at an expensive price.
  • Mountain Hardware - They are an American company who sell great kit at a reasonable price.
  • The North Face - They are an American company who sell great kit at a high price.
  • Marmot - They are an American company who sell great kit at a high price.
  • Berghaus - They are an English company who sell good kit at a reasonable price.
  • Rab - They are an English company who sell great kit at a slightly expensive price.
The list goes on...

Recommended Kit
We in the club have Keela jackets in the store which have stood the test of time. We have created the following short list for each season and some all rounders, taking budget into account:


  • All-Rounders
    • Low Budget (Sprayway Santiago Interactive Jacket - £70)

    • Medium Budget (Montane Atomic DT 2.0 2009 - £100)

    • High Budget (Rab Drillium 2009 - £160)

  • Summer
    • Low Budget (Berghaus RG1 Jacket - £90)

    • Medium Budget (Berghaus Askival Paclite® Shell GORE-TEX® Jacket - £130)

    • High Budget (Haglofs Astral Jacket - £215)


  • Winter
    • Low Budget (Keela Munro Jacket - £160)

    • Medium Budget (Rab Latok Alpine Jacket - £220)
    • High Budget (Paramo Mens Alta II Jacket - £245)


All Prices are based on RRP: you can get them allot cheaper elsewhere online eg ebay or other online retailer.

Monday, 24 December 2012

Introduction To Navigation Slides

These are the slides from the Introduction to Navigation Session, please feel free to have a look through.

Below is the website that we use for explaining where we will go on the trip and which route (or routes) we will most likely take.

Friday, 14 December 2012

Winter Skills Course Kit List (Our Own On 18th to 20th January 2013)


Here is what you will need to do our own winter skills course. Everything labeled with a ST we can provide. This is a list of essentials, you will need at least this kit, if not you won't be able to go out in the mountains.

  • Rucksack (ST)
  • Boots (stiff soled) (We will be collecing these from Tiso in Perth)
  • Gaiters (ST)
  • Waterproof jacket (with hood)
  • Waterproof overtrousers 
  • Ice Axe (ST)
  • Crampons (ST)
  • Helmet (ST)
  • Thermal top or vest
  • Fleece or wool sweater
  • Spare fleece
  • Warm mountain trousers
  • Thick socks
  • Compass (ST)
  • Map 
  • Map case
  • Warm hat
  • Gloves or mitts 
  • Spare gloves or mitts (recommended to have 2+ sets of gloves)
  • Ski goggles - These are extremely highly recommended!
  • Headtorch (and spare bulb & batteries) (ST)
  • Thermos flask or water bottle 
  • Container for packed lunch - bag or box

Sunday, 2 December 2012

Climbing Update

We went climbing today and managed to avoid the football crowds at the Ibrox! Today we all got some decent climbing done and a good day was had by all.

We will be going climbing on Wednesday and again next week.

We are all looking forwards to the end of exams and will be looking forwards to the winter skills following that.

Wednesday, 21 November 2012

Weekly Update

We went climbing today after checking on the bouldering wall at university, it is getting on nicely and will be up and running by the end of the exams (well hopefully).
The climbing went well and fun was had by all, we will be adding photos later on.

Remember those who want to go on winter skills you need to have paid by next Wednesday or you will not be going.

Saturday, 17 November 2012

Climbing Update

We will be going climbing tomorrow at the Ibrox Climbing Center. We still have 6 spaces available for the trip.

There will only be climbing trips from now until the Winter Skills on 18th to 20th January. Normality resumes this week, there will be a weekly update on Wednesday.

Reminder - For those who haven't done winter skills we need to book the accommodation and the deadline is coming up fast. Please email in to let us know that you would like to go.

Friday, 9 November 2012

Boot Selection


Boot selection is a bit of a contentious topic within the Club:  boots are probably the single most important item of clothing you will use out hillwalking, even more so for winter mountaineering and walking.  Keeping the feet warm and dry is critical to physical ability and morale – support to the sole of the foot and the ankle are exceptionally important on rocky ground and, in winter, you can’t kick steps or wear crampons on soft soled boots/shoes.  Blistered feet make for miserable days out and wet feet are more liable to be cold, blistered and sore.  A member of a walking/climbing party with badly blistered and cold wet feet in Winter compromises everybody’s safety.  We have turned people away from trips in the past because of unsuitable footwear and we will do it again – it isn’t fair on everyone else.

However, boots are also probably the single most expensive purchase you’ll make for your hill walking gear and, when money is tight, is probably the first to be ‘cut back’ on.

There are options:  you can hire winter and 3-season hillwalking boots at Tiso OE if you don’t want to buy some yet.  Or maybe borrow some suitable footwear off a friend.

It’s all very well us telling you that you need ‘suitable footwear’ for Scottish hillwalking but, what does that really mean?

For most of the year, a pair of 3-season boots is adequate for hillwalking in Spring, Summer and Autumn, and for LOW-LEVEL walks in Winter.  However, as soon as Winter hillwalking and mountaineering is on the cards, these are no longer safe.  To wear crampons and kick steps, you need boots with at least a B2 rating – this means supportive, warm and a stiff sole that you cannot bend with your hands.  All boots should rated for suitability for winter use:  if they don’t have a ‘B’ rating marked on the label, they are probably B0 and are NOT for use in the hills in Winter.  Wearing these in Winter in the Scottish mountains puts you and – more importantly – the other people in your group at risk. 


3-season leather boots


3-season fabric boots (these Asolo Flame GTX are currently available for around £100 if you look around)

So, a pair of 3-season boots will be waterproof (very important in Scotland!), with a good grippy sole and a high supportive ankle (ie, NOT a shoe!).  They can be fabric or leather or a mix of both but if they don’t look like much the ones in the pictures above, you’re in trouble!  For a decent pair of 3-season boots, you are looking at from £90 upwards with sale prices.  Anything less than this is very unlikely to be suitable, and most boots will be a lot more expensive.  “Trekking” boots are generally not designed for hillwalking so be very careful if you are offered these – always ask if they are 3-season and are suitable for Scottish hillwalking, and if the sales assistant doesn’t know, leave them alone.  Always get boots in the sales or at a discount – never pay full price for any outdoor kit!  And try to get them from proper outdoor shops like Tiso, Cotswold Outdoor, Nevis Sport, etc.

4-season Winter boots generally come as either thick leather (La Sportiva Nepals, Scarpa Mantas, etc), modern fabric boots (usually with a Goretex liner, or similar) and plastic double boots (eg, Scarpa Omegas or Vegas, Asolo, Kofflack).  They usually have insulation to keep your feet warm and a stiff sole which you can hardly bend at all with your hands – this means they will be stiff enough to kick steps and take a crampon.  The stiff sole also supports your calves when front-pointing on crampons. It is normally recommended that if you have a pair of these all singing all dancing boots that you use approach shoes on the walk in due to the fact that you will most likely be tired out quicker and in a bit more pain due to the lack of flex in the boots


Thick Leather, B3 La Sportiva Nepals (compulsory for mountain guides!)


Classic Scarpa Vega Double Plastic Boots

Winter boots are expensive, no doubt:  anything from £180 upwards new for something like a pair of Scarpa Mantas in the sales.  You can get some bargains on eBay if you know what you’re looking for, especially plastic boots and you can pick up a pair of indestructible Scarpa Vegas for about £25-£30.  However, winter boots (and especially plastics) can be very rigid and it is sometimes a bit like walking in ski-boots.  So, always try out something similar so you can gauge the fit and comfort before you buy.  Again, Tiso will hire out winter boots and many people just do this all winter rather than buy them.


Scarpa Mantas – Possibly the most popular 4-season boot.

So, please don’t pitch up with crap boots, trainers or walking shoes or we’ll send you home again – especially in Winter. 

If you’re worried about footwear and want some advice, feel free to ask some of the more experienced Club members.

Wednesday, 7 November 2012

Weekly Update

The climbing went well today, we have a few more members and a few who are looking to take their test next time. The photos taken today have been added to the bottom of this post, the teaching took place in the beginning and then we developed on what was taught throughout the day.

We have had to cancel the abseil on Sunday and hope to have rearranged it for the following Saturday (17th November) - Remember to let us know if you are interested in coming and then we wont have to cancel again.

We will be continuing climbing over the next few weeks as normal.


Care for Waterproofs


Care Of Your Clothing

After a hard day on the hill, whether it’s summer or winter, it’s easy just to
throw your dirty kit in the bottom of the cupboard until next time it’s needed.
However, you really need to look after your kit if you want it to look after you.
It may seem like a pain in the arse to have to clean and sort your clothing and
boots but it’s far better you spend 30 minutes on it at home than to be sat out
in the cold as the water seeps into your clothing and the wind chill starts to
bite…

Waterproofs

Ignoring waxed garments like Barbour jackets, hillwalking waterproof jackets,
trousers and gaiters work in either one of two ways:

a.

These are often known as hard-shell layers and usually consist of a
porous membrane bonded to a protective outer layer which is treated
with a Durable Water Repellent (DWR) coating. The membrane has
tiny holes in it which are large enough to allow water vapour from your
sweat to exit but small enough to stop water droplets coming in. The
DWR causes rain to ‘bead’ – look at it on your own waterproof – and
run off without soaking into the outer layer. These types of waterproofs
are the most popular and come in many different ‘flavours’, weights
and varying levels of ‘robustness’.

b.

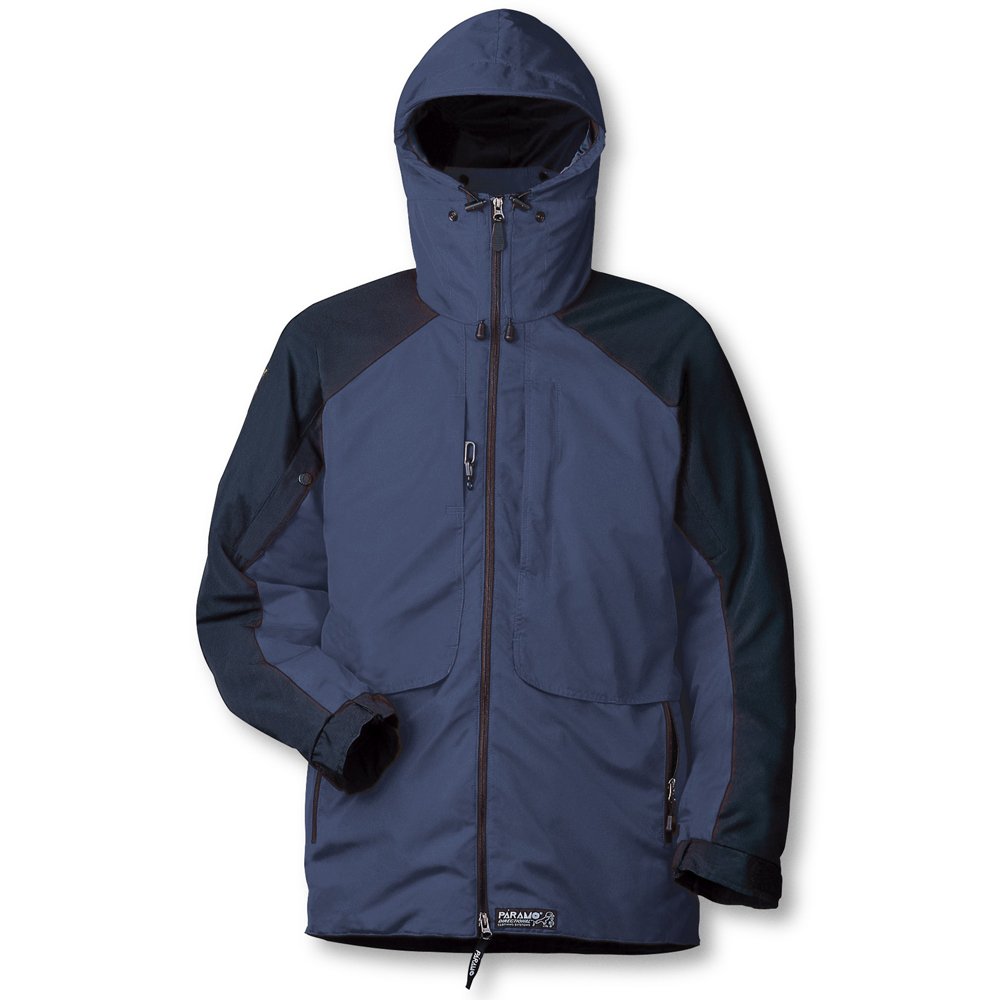
Fabrics like Paramo Analogy have two non-bonded layers: the inner
one pumps water away from the skin using a one-way capillary action,
this then passes out though the thinner face fabric which will have a
DWR coating to stop water coming back the other way. These kind of
garments tend to be warmer, heavier and more expensive but can be
repeated reproofed and repaired with a needle and thread, are often
more hardwearing and last longer than hard-shell membrane clothing.

When you come back from a hill day, wipe the mud and dirt off your
waterproofs using a sponge or cloth and some cold water – no soap! If they
are absolutely filthy, you need to wash them – dirt clogs the membrane or
face fabric so it doesn’t ‘breathe’ anymore. Whatever you do, DO NOT USE
A NORMAL WASHING DETERGENT LIKE DAZ, ARIEL, ETC! The reason
is that these will strip the DWR coating off your waterproofs straight away.
You’ll know the DWR coating is gone when water doesn’t bead on the surface
anymore and just soaks in – or ‘wets out’ as it’s usually known.

So, what do we do to clean and reproof our waterproofs? First of all, you can
either wash them in a washing machine or handwash in a bucket/sink/bath.
If you use a machine, take the detergent tray out first, wash it, wash the hole
in the machine it goes into and rinse it all through. Then run the machine

Membranes (Goretex, Event, Drypoint, Hyvent, Sympatex, etc).

Pumpliners

empty on a hot cycle to clear out any remaining detergent. You then have a
choice: either use a specially made soap like Nikwax Techwash or Granger’s,
use pure soap flakes (which I have always found difficult to get hold of) or,
buy some plain simple unperfumed soap and grate about 1/3 of a bar with a
cheese grater. Don’t use the grated soap in the washing machine, only for
handwashing or it will foam everywhere and your kitchen looks like an Ibiza
Club Night.

Once washed (use the temperature and wash cycle indicated on the label or,
if there isn’t one, usually a 30-40 degree standard wash will do), drip dry or
put in the tumble dryer on a warm setting – not hot. The warm tumble dryer
will actually help reactivate the DWR coating if there’s any left.

If the waterproof is wetting out, it’s time to put that DWR coating back on!
This is usually using a wash-in or a spray-on fluid like Nikwax or Grangers.
Again, you can either handwash or use a machine but take the same
precautions as before and get rid of any detergent still in the machine first.
You can drip dry the clothes afterwards but you’re better off with a warm
tumble dryer as this helps activate the DWR chemicals.
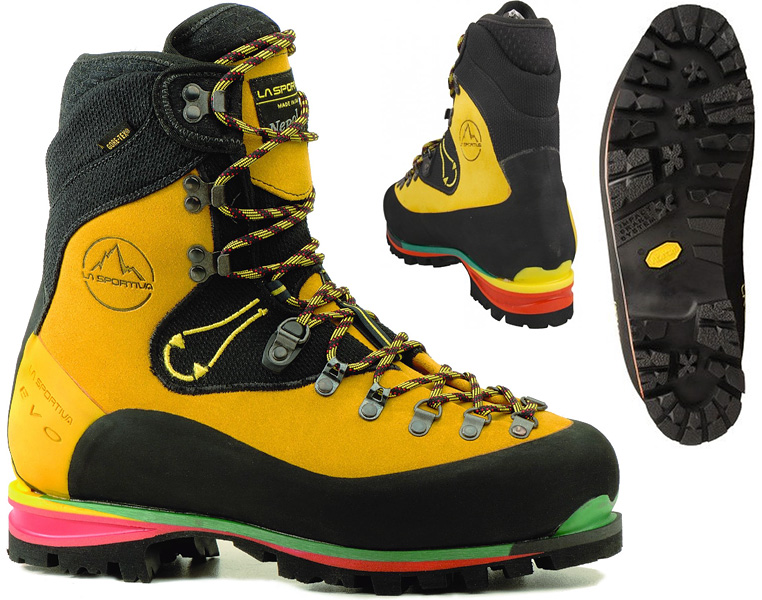
Boots

Get rid of as much dirt from the upper and sole of the boot as you can –
maybe wash them off under the tap or shower. Dry your boots naturally –
ie, not on the radiator! This damages the fabric or rubber, especially if the
boots are leather (it will crack and split). Take out the insoles, undo the laces
and open out the boots. Stick some scrunched-up newspaper in too to help
absorb water – change it regularly.

Once they are dry, use a stiff nylon scrubbing brush to get rid of mud and dirt
from the uppers and then either reproof using a leather conditioner or a boot
proofer from Grangers or Nikwax. Store them somewhere cool and dry.

Fleeces/Technical Layers/Softshells

Basically, wash sweat and dirt out of them so they don’t stink and still
wick sweat away from your body – they won’t if they’re dirty! Follow the
instructions on the label. If you have trousers/jackets which are water
repellent (softshell perhaps), you may need to wash and reproof them with
your waterproofs.

Summary

Basically, don’t just chuck everything in the washing machine. At very least,
wipe your waterproofs down with a wet cloth/sponge and cold water.

STUDENT ON THE WAY OUT TO THE PUB RAPID SUMMARY

Look after your kit if you want it to look after you.

Don’t wash your waterproofs with normal detergent. Use a pure soap and a
reproofing liquid.

Don’t dry your boots by the radiator. Brush the mud off your boots when its
dry. Use a reproofer every now and again.

Wash your fleeces, technical layers, etc, so that they don’t smell, they feel
nice, and they breathe properly.

Saturday, 3 November 2012

Ben Vane Review


The Ben Vane trip went well, everybody took something from the Trip.We didn't make it to the top because the terrain was too risky under foot without ice axe and crampons, as most of the members were not winter skills trained we decided enough was enough. Everybody seemed to enjoy a taste of winter and a little scrambling.

It was quite disheartening calling it off when we were 75m from the summit but it was the right call.

Here is a list of today's events and photos:

At 8:30AM we left the Gear Store to Inveruglas
We then arrived and got ready for the day ahead, also we had a look at the view from the car park.
We then set off on the walk and right out the car park as on the map the power plant came into view.
The Group are looking forwards to a day on the hill as we walk past the power plant.
We join the track that we will follow until we reach the path. It is a relatively long walk in.
The railway bridge that we passed under previously shows signs of life when a train shoots past.
A fence surrounding some transformers comes into view, looks like the distribution for the power plant.
We meet some cows just past the power station.
Ben Vane comes into sight with more snow than expected.
Following the track around Ben Ime and Beinn Narnain come into sight.
Group photo on the path before the long ascent.
The group push on but we are keeping an eye on the terrain underfoot.
The group stop for a rest and admire the snow on the mountain.
Ok group meeting, we need to decide what we are going to do... We decided to play it by ear and see what the terrain turns to ahead.
We decide to call it quits and advise the group not to continue as the terrain underfoot is awful and will be tough on the way down.
Its starting to get a little dark but then looking up there is a huge dark cloud above us.
We then went into Arrochar for some well deserved chips and then went home.

We hope everyone enjoyed it and aren't too discouraged by not being able to get a munro bagged, as Hervey Voge said "The mountains will always be there, the trick is to make sure you are too".

We will be having a meeting on Wednesday and then going climbing later on. We will be finalizing the details for the sponsored abseil soon.

Friday, 2 November 2012

Last Weather Update for Tomorrow

Now that we have a more accurate forecast form MWIS, we will ignore the Met Office as this is a broader forecast for looking at what the weather systems are doing and what is coming our way.


As we can see from this forecast we have an improved forecast as the low pressure has moved North-West rather than West. This has resulted in less winds and a higher chance of a cloud free munro. However the freezing level has remained the same meaning that it will be a cold day.
Due to these conditions we will be hoping to get the top but be prepared to not summit if the conditions under food do not allow without ice axe and crampons.

Thursday, 1 November 2012

Weather Update for Saturday

There is some bad news with this update, the weather is not looking the best.
Considering the Surface Pressure Chart (http://www.metoffice.gov.uk/weather/uk/surface_pressure.html), we get an increase in the wind from morning to afternoon as a low pressure will be moving in. Using the rough rule of thumb that for every isobar covering the uk that is 10mph of wind we get the wind increasing from 30mph (top image) to 60mph (bottom image):


Then if we consider the more detailed MWIS forecast (http://www.mwis.org.uk/wh.php and below), we can see that the winds range from 30mph to 45mph in the morning to 60mph gusts in the afternoon. In this case the rule of thumb was relatively accurate but it is a very rough estimate most of the time. There are also snow showers forecast and the cloud base and freezing level at 700m with only a 10% chance of a cloud free munro. 


It will most likely be a taste of what is to come in the winter, so everyone remember to suit up and be nice and warm. We will play it by ear as to what we do when as we can not estimate how the group will respond to the conditions or what the exact conditions will be like.

Wednesday, 31 October 2012

Weekly Update

The climbing today was canceled as everyone was busy with coursework :(

We will be going climbing next week and will have a few new members down to go, we already have 2 who are ready to learn and have signed up already.

We are now keeping a close eye on the weather for the trip this Saturday, we have many members who have not done winter skills so we may split the group when we get so far, one party will carry on to the summit the rest will descend down and do some navigation training.

We will be updating predictions later on in the week but at the moment it is looking good but everyone will need to wrap up warm.

Safety and Other Essential Reads

Hi All,

Here are some more essential safety and generally helpful things that will be worth having a read through:


  • As for putting the crampons on your boots here is a good guide (below), remember you should not be able to twist your boots in your hand without great difficulty for them to be acceptable for crampons.

  • Here are the basics of how to use the crampons:


  • Remember we will be going on winter skills in January to put these skills into practice.

Sunday, 28 October 2012

Winter Mountaineering Kit List

With Winter coming soon, we thought it would be great to add a list of what you will need for winter and some videos to the important concepts that need to be grasped before winter.

Here is the Layering System concept (Extremely Important to have the right gear):


Here is the Ice Axe Self Arrest techniques that will be practiced on the winter skills courses:


While these are essential skills and concepts which need to be learnt, we still need the correct kit with us, here is a list that we composed from various other lists from our personal experience:

Personal Kit:
Wearing (Well Probably):
a good fleece or soft-shell jacket)


On in your pockets / in the bag (Mid sized rucksack between 35-55 litres):


More spare food (remember your sugary snacks, keep this at the bottom of your bag as then it will be there for an emergency and not eaten when you stopped for lunch)
Personal first aid kit (Medication etc.)
Helmet
Walking Poles (Optional)
Water bottle (remember you need to keep hydrated)

Group Kit:
Group Shelter
Rope (if it is severe enough or if climbing)
Group first aid kit
Avalanche probe (ideally)


If going Climbing:


This is only a guide of what to take with you, remember winter mountaineering is dangerous and should not be taken lightly, for more information please refer to the Mountaineering Council of Scotland website.

Trips Update

We will be doing a sponsored abseil at Neilston Quarry on the 11th November 2012, see the link below:
https://www.scottishclimbs.com/wiki/Neilston_Quarry

This will be to raise money to help reduce the cost of trips in the future to our members. We are hoping to raise as much as possible. There will be lots of photos taken of the event and a full review posted afterwards.

Saturday, 27 October 2012

Climbing Trip Cancellation

Sorry for the late notice, we have had to cancel the trip the the climbing wall on Sunday due to members being busy with university coursework.
We will be going climbing again after the meeting on Wednesday. Also we are keeping an eye on the weather forecast for the Ben Vane Trip, if it snows a lot between now and then we may do a low level navigation practice instead.

Wednesday, 24 October 2012

Weekly Update

We had our worst turn out at today's meeting with just 4 showing up but it is time to get heads down with projects at university, one of the downsides of a university mountaineering club.

Two of us proceeded to go climbing and we got another member at the GCC signed up so we have about 16 times the members that we had last year at this point. Everyone seems to be looking forwards to the Ben Vane Trip which is looking to be good fun if we get a bit of good weather.

We will also have our secretary bring his camera climbing so we can take some pictures if we get a spare moment.

Will be updating and reviewing trips as per usual.

Sunday, 21 October 2012

Climbing Review

The climbing went well today, slightly less people turned up then expected so I didn't get a chance to get the camera out and take some photos, here are some from the last time though:


As a bonus, while waiting for some of the people that didn't show up today we tidied the gear store from the last trip.
There will be the normal weekly update and I will be organizing an advanced navigation course in the future.

Saturday, 20 October 2012

Promotional Video

Sorry for the Delay in putting this up, here is the video taken on our trip up North to Ben Hope which we added to the Student Association Website to show everyone what type of thing our club does.


Introduction to Navigation Training Review

Went and forgot my camera again, packed it for tomorrows climbing already so wont forget it then.

The Navigation training went well everyone picked up the concepts really quickly especially orientating the map whenever you can so you can easily tell where you want to go.
We went ahead and even got to bearings and orientating the map which everyone excelled at, next time we will be going on to pacings, reading contour lines, more catching features, off bearings and dead reckoning.
Everyone was really happy with what they have learned today and are looking forwards to putting their newly found skills into practice during our next trip to Ben Vane.

Here is the presentation used if anyone would like a look.
http://prezi.com/q7scflvsouif/introduction-to-navigation/

Wednesday, 17 October 2012

Weekly Update and Climbing

We had the weekly meeting today to discuss what we are going to do over the next few weeks.
This included the navigation training on Saturday, we have a lot signed up to it and it is looking to be a day where the club will benefit a lot from the canceled trip.
Then we will be going climbing on Sunday which has a few more interested.
Next besides the climbing next week will be the trip to Ben Vane.

We went climbing this afternoon to give an intro, we will have a lot more members soon with the rate of progress that everyone is making. I went and forgot my camera again though :(

I will be bringing my camera this weekend and reviewing the navigation training and climbing sessions.

Saturday, 13 October 2012

Trip Cancelled

There has been some bad news, our youth hostel canceled on us for the Cairngorms trip and we couldn't get a driver, so instead we will be doing some navigation training on the Saturday and then some climbing on the Sunday so we are still making the most of the weekend.

Friday, 12 October 2012

Future Trips Update

We have now got a few climbing trips planned on the weekend so we can all improve our climbing. We will be going to the TCA in Glasgow soon. We will just let our new people to climbing get a hang on the ropes first. We were going to do some navigation training as well but there are not that many hours in the day. We will probably do some navigation training on the next walk. There will be some more pictures up soon of our adventures.

Wednesday, 10 October 2012

Weekly Update

We had the meeting today where we discussed the Nevis trip. Then we went to explain what we will be doing over the next few weeks, we will be planning a few one day trips on Sunday's from what we heard from our members today. We then went climbing with 4 members and 3 guests. All thoroughly enjoyed it and we are looking forwards to next week.

Sunday, 7 October 2012

Ben Nevis Via CMD Arete Review

We decided to go for the CMD Arete in the end as the weather forecast was great. This involved what we estimated was a 12 hour day judging by group experiance.

We set off into the mist at 8:00AM after a 6:00AM start.


Then we started to emerge from the fog just to turn back and see that it is still there beneath us. We got a few good pictures of this rare event.


After all of there photos we began ascending again, taking more photos as we went.


We met a lovely old man who was walking up Ben Nevis for charity, he was part of a group and had set off earlier so that they were not waiting for him. We left him to get on with his sponsored walk and proceeded to the Lochain.


The Lochain has came into sight and we are making good time it is now 9:30AM so we are ahead of schedule by 30 minuets.


The path has split so we can see our route of descent behind us, I am sure that most of the group will be happy to be back at this point. We have now been joined by a German man, he is very friendly and is walking the same route as us. 


As the Northerly face of Ben Nevis comes into sight the groups pace slows.


 Our friend decides to say bye and heads off increasing his speed.


As the valley comes more into view the clouds lift more to give us a sight of the task ahead.


Then before the grand ascent we stopped for a bite to eat and put up the bothy for a rest as the weather closes in around us. After a 20 minute break we set off up the steepest part of the walk.


We can hear what sounds like a helicopter in the distance, but carry on.


We then heard the noise getting louder and turned to see the Mountain Rescue Team helicopter behind us (at the same height) so we stopped and watched for a few minuites.


Ben Nevis's North Face emerges from the clouds in a spectacular fashion.


We then after a long climb (where the pace slowed considerably) reached the ridge just before Carn Mor Dearg,


The top of Carn Mor Dearg, but as per usual the clouds come in just as we get to the top.


The beginning of the CMD arete comes into sight.


Then the clouds start blowing over again, revealing the North Face of Ben Nevis again.


The clouds blowing over has left us with a unique view of the CMD Arete and an idea of how the air flows over it.


We then picked a spot to descend and have a bite to eat.


We have had to make a hard decision and some of the group will be descending with Kris and will be meeting up with the rest of us at the Lochain later.


As the clouds have mostly gone and the wind has died down it is looking to be a great day out on the hill.


The group enjoying some easy scrambling on the arete.


Great views, great day out on the hill. The group are slowing a little but it is nothing to be concerned about at the moment.


The views seem to just get better and better as we keep going, hoping it will keep till we get to the top. The group are really enjoying it.


The group all pose for a picture with a beautiful backdrop.


The clouds are closing in again and we are now encountering more snow and ice as expected.


The observatory comes into focus.


Then the refuge hut comes clearly into view but it is absolutely filthy inside and some holes in the side, shame some people can't look after the hills when they get rewarded with such views for the most of it.


Then we decided to celebrate getting to the top of the highest mountain in Britain from one of the interesting ways. We are a little late as it it 5:00PM.


Then while descending the clouds begin to rise again to reward us with a great view.


We meet up with the other group at the Lochain and are surprisingly only a few minutes behind time. We will have to to the last bit of descending in torch light but it has been worth it for such a great day on the hill.


We arrived at the youth hostel at 8:10PM which is only 10 minutes behind schedule?!?!?!

We will be going climbing on Wednesday and reviews to follow. Hope you enjoyed looking through our trip photos.

Overall review of the trip:

The Trip went well, we had great views. We set off early into the mist and emerged above it for some truly amazing pictures over the valley. Then we were ahead of time getting to the Lochain, we then proceeded onto the mountain hut. Upon arrival here the weather closed in so we stopped and had a snack in the bothy. After a short rest we then continued up Carn Mor Dearg where the pace slowed. After getting to the top and having a little rest we descended a little when the clouds lifted to reveal a great view of Glen Nevis and the CMD arete we were going to follow. We carried on the CMD arete until 14:20 when we stopped for lunch in a bit of shelter from the breeze. At this point a member of the party had to descend with Kris as the ridge was getting too unbearable for them. The rest of us carried on and enjoyed great views over the ridge and some scrambling. Then after the CMD arete we then ascended Ben Nevis to find snow and ice greeting us. We enjoyed exploring the old buildings and a photo opportunity on the carn. We then descended down to the lochain where we met Kris and the other member. We then dropped down into the valley in the light of our head torches.
The next day we ascended up to the fort to find an amazing view over the valley. Then we descended and left for home stopping at the Drovers Inn on the way.